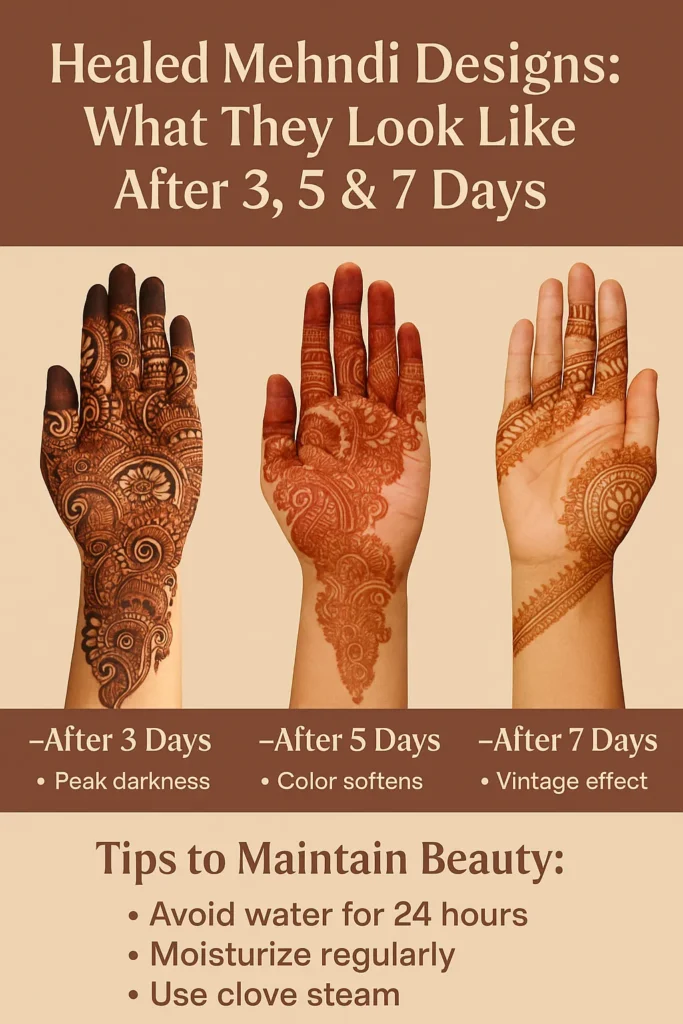
Healed Mehndi Designs: What They Look Like After 3, 5 & 7 Days (With Tips to Maintain Beauty)
Introduction: The Real Journey of Mehndi Begins After Application
When we talk about mehndi or henna, we often focus on the application—its fragrance, the beauty of the design, and the excitement of seeing the fresh orange paste on the skin. But what many people forget is this: mehndi isn’t just about the application day. The real magic happens in the days that follow. That’s when the design deepens in color, blends into your skin tone, and becomes a reflection of patience, care, and your personal aesthetic.
In this detailed article, I’ll walk you through the entire journey of healed mehndi designs—what they look like after 3, 5, and 7 days, how to maintain their beauty, what factors influence the healing process, and most importantly, how to make your mehndi last longer and look richer. Whether you’re a bride, a festival enthusiast, or just someone who loves body art, understanding how mehndi evolves will completely change the way you approach it.
Why Healed Mehndi Matters More Than Fresh Mehndi
You’ve probably seen stunning bridal photos on Instagram with rich, dark mehndi. What many don’t realize is that those photos aren’t taken right after application. In fact, most of them are captured 2–3 days later, when the color reaches its peak. That’s why understanding how mehndi heals is essential—because it influences your overall look, your event planning, and even your photoshoots.
Fresh mehndi is always orange at first. It might look bright and beautiful, but it’s nowhere near its final color. Once the dried paste is removed, the stain starts its journey—gradually darkening and blending with your skin tone over the next 48–72 hours.
Part 1: What Mehndi Looks Like After 3 Days
The Peak Color Phase
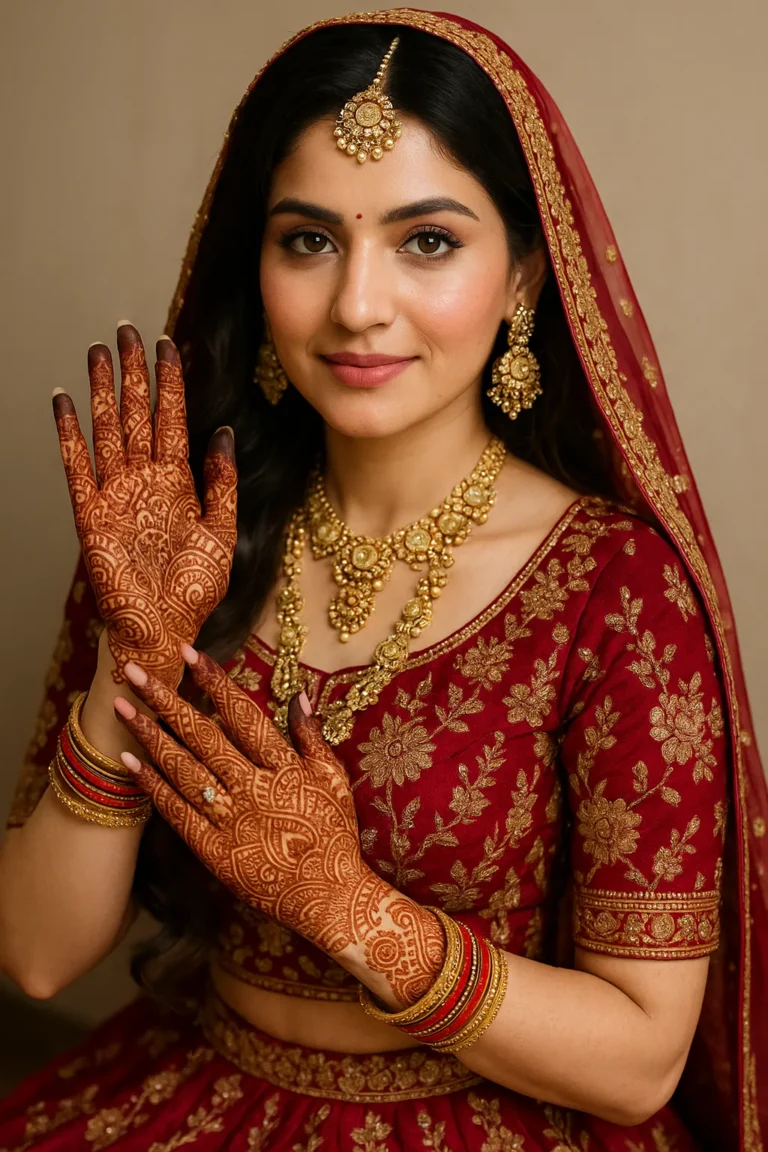
On day 3, the mehndi stain usually reaches its deepest and most intense color. This is the moment most brides and models wait for, especially for photography or special occasions.
- On fair or light skin tones, the color appears reddish-brown to maroon, sometimes even dark chocolate if proper care is taken.
- On wheatish or medium tones, it looks deep brown, often with rich undertones of burgundy or black.
- On dusky or deep skin tones, the mehndi appears bold and dark, with warm, dramatic contrast.
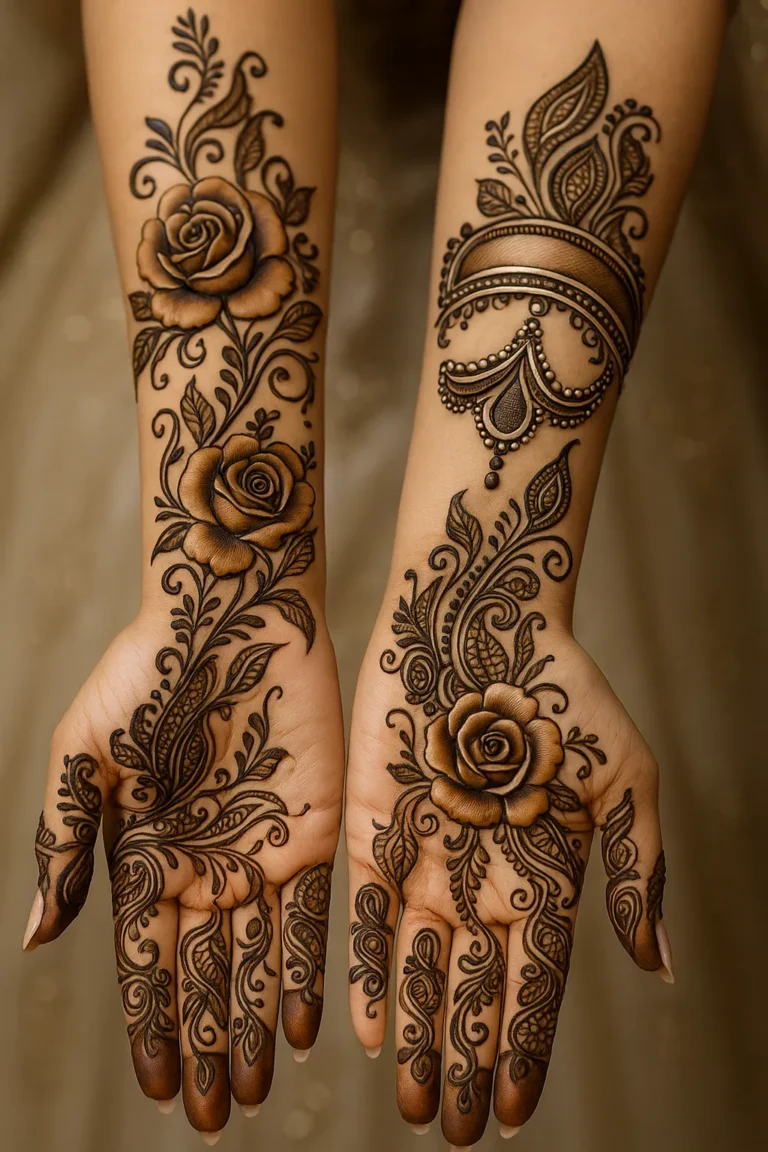
Design Clarity and Boldness
By day 3:
- Thin lines become more prominent.
- The contrast between skin and design is highest.
- Intricate details like dots, jaali, and shading become fully visible.
This is the ideal time for photos—especially for weddings, parties, or festive portfolios.
How to Maintain the Day-3 Beauty
If you want your mehndi to glow on day 3:
- Avoid water contact for at least 24 hours after application.
- Rub coconut oil or mustard oil before bathing to shield the stain.
- Use clove steam for 1–2 minutes post-scraping to deepen the tone.
- Avoid soaps and handwash with chemicals.
Part 2: What Mehndi Looks Like After 5 Days
The Natural Settle-In Phase
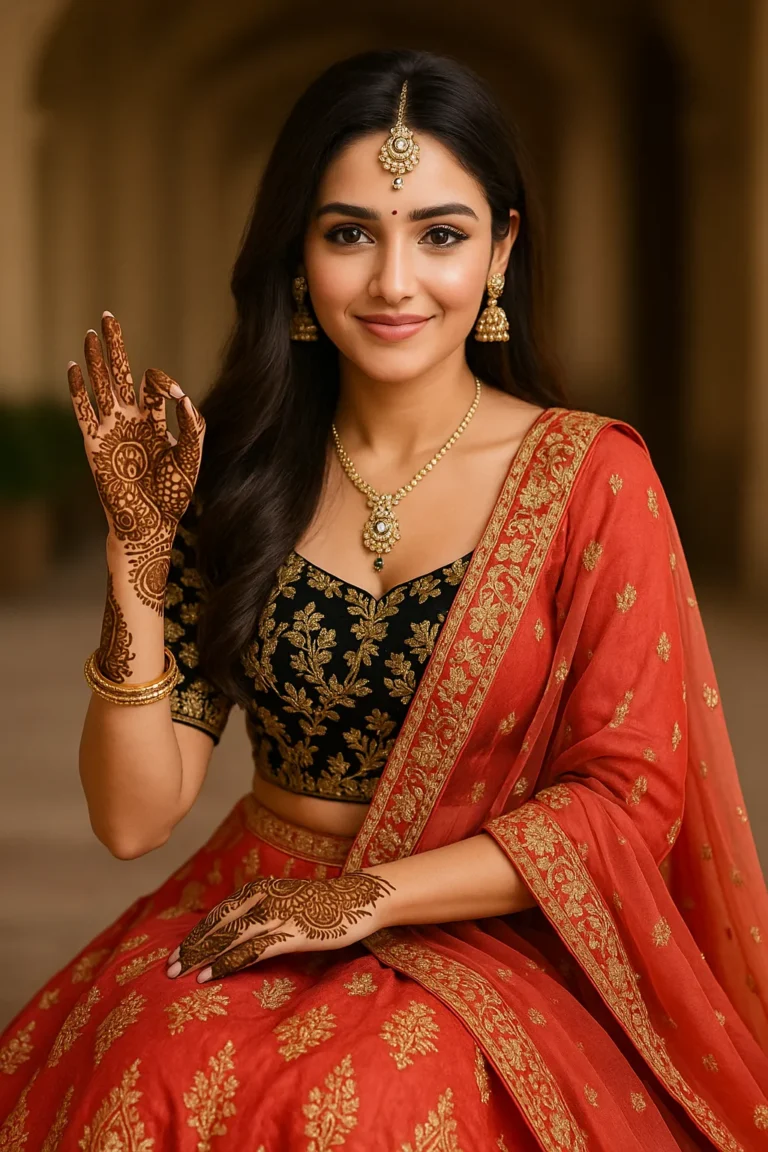
By day 5, mehndi starts to settle naturally into the skin. While the color might slightly fade, the beauty of healed mehndi becomes more graceful and realistic.
- The stain becomes softer and deeper rather than stark.
- On fair skin, the reddish tones fade slightly to brown.
- On dusky skin, the stain still holds strength due to natural contrast.
Read More: Mehndi for Every Skin Tone: Design Contrast, Color & Clarity Tips
This is often the most balanced phase—where mehndi blends in harmoniously with your skin without looking too bright or too dull.
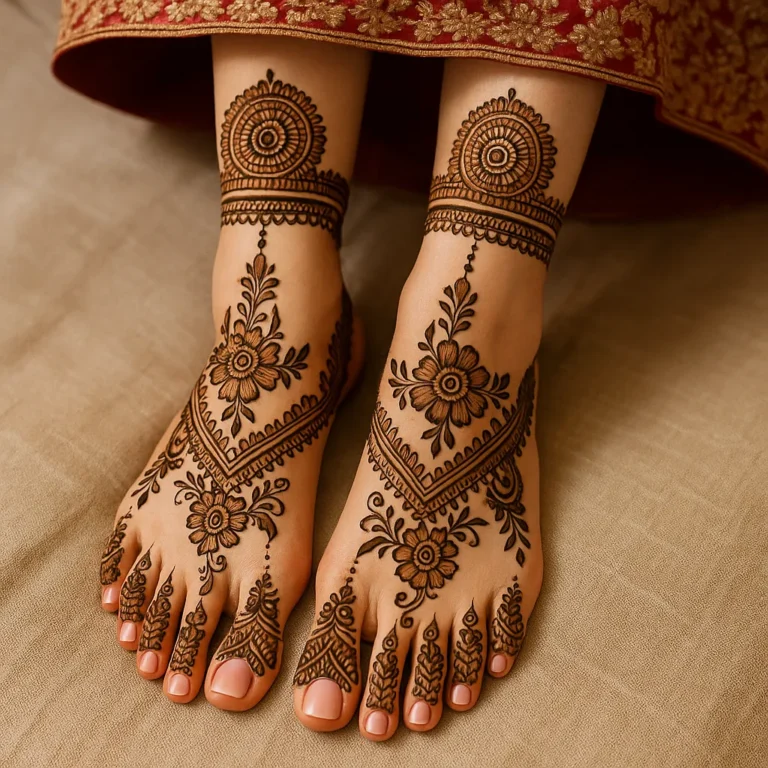
Changes You’ll Notice:
- Slight lightening of tips and edges of the design.
- Central parts (like palm centers or foot arches) still remain dark.
- Finger tips may start to show minor fading.
Best Practices to Preserve Design on Day 5:
- Use natural oils daily (coconut, sesame, mustard).
- Avoid long showers or chlorine exposure.
- Avoid exfoliating scrubs or loofahs.
- Moisturize frequently—but avoid bleaching creams.
Personal Note:
I often tell brides to schedule their photo shoot or reception on day 5. Why? Because it’s the day when mehndi has adapted perfectly to their skin tone, looks completely healed, and gives a soft, romantic appearance—perfect under camera lights.
Part 3: What Mehndi Looks Like After 7 Days
The Fading Begins (But Gracefully)
By day 7, your mehndi design begins to fade gently, especially in high-use areas like the fingers, palms, and heels. But if you’ve taken good care, the design still looks charming and rustic—the kind of look people associate with romantic endings and nostalgic memories.
This phase reflects:
- A soft brown tone on light skin.
- A deep ochre or dull brown on wheatish skin.
- A subtle warm brown on dusky skin.
What You Might See:
- Outer edges fade first.
- Inner designs stay a bit longer.
- Parts on joints (like knuckles or toes) begin to break.
This is the “vintage phase”—ideal for candid, post-wedding, or vacation photographs.
Extend Its Beauty Further
- Avoid excessive hand washing.
- Don’t rub the design while drying hands or feet.
- Continue applying coconut oil and clove steam every alternate day.
The Science Behind Mehndi Fading
The henna pigment, lawsone, binds with keratin in the skin. As your dead skin cells shed naturally, the color disappears layer by layer. That’s why areas like palms, which have thick skin, hold the color longer, while upper arms or ankles fade faster.
Things that affect fading:
- Skin type (oily skin fades quicker).
- Exposure to sun and water.
- How long the paste was kept.
- Type of henna used (organic vs chemical).
Top 10 Tips to Make Mehndi Last Longer & Look Better While Healing
- Keep Paste On for 8–12 Hours: Overnight is best.
- Wrap with Tissue or Cloth at Night: Prevents drying and cracking.
- No Water for 24 Hours: Affects stain development.
- Lemon-Sugar Dabs: Every 2 hours for moisture retention.
- Avoid Soaps for First Day: Let stain develop naturally.
- Use Clove Steam or Warm Mustard Oil: Boosts darkness.
- Avoid Bleach, Detergent, or Hand Sanitizers.
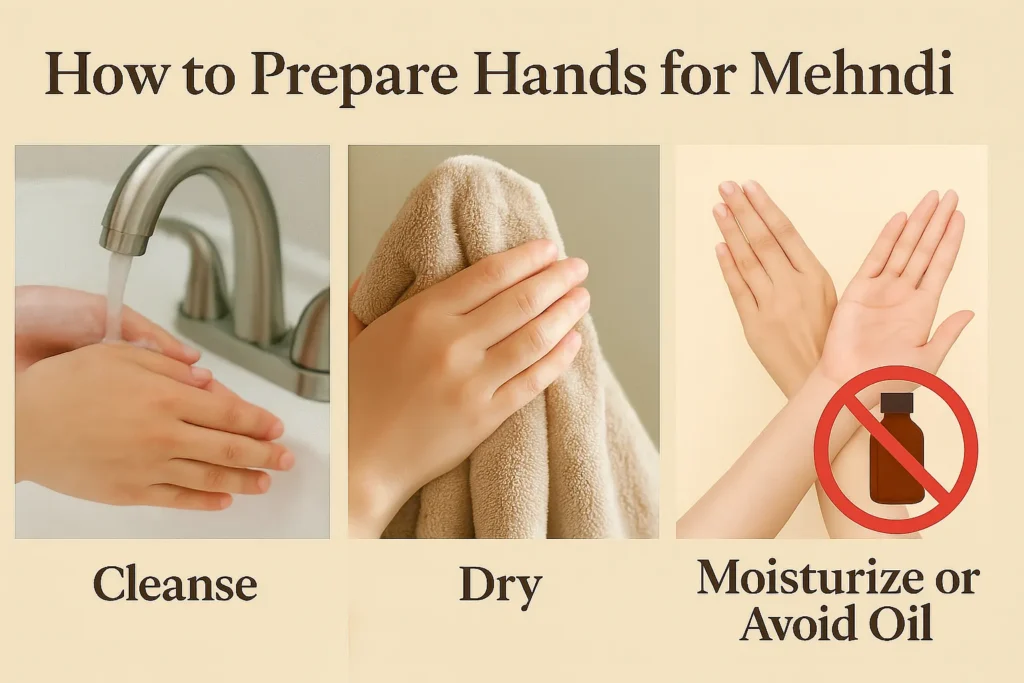
- Exfoliate Before Application, Not After.
- Stick to Organic Henna Only.
- Stay Warm: Body heat enhances stain development.
Visual Guide: Color Timeline of Healed Mehndi
| Day | Appearance |
|---|---|
| Day 1 | Bright orange after removing paste |
| Day 2 | Deepening to reddish-brown |
| Day 3 | Peak darkness – chocolate/maroon shade |
| Day 4 | Slight blend into natural skin tone |
| Day 5 | Balanced rich color |
| Day 6 | Mild fading begins |
| Day 7 | Soft brown vintage effect |
Real Stories from Real People
Aarushi (Bride, Himachal Pradesh):
“I panicked on Day 1 when my mehndi looked orange. But by Day 3, it turned into this gorgeous deep brown. I followed all the oiling and clove steam tips—and it was perfect for my mountain wedding shoot.”
Neha (College Fest, Mumbai):
“My mehndi was for a college fashion show. On Day 5, the softened design actually matched my Indo-western look better than the initial bold stain!”
Samira (Eid Celebration, Hyderabad):
“Even on my dusky skin, my mehndi stayed bold till Day 7. The double outlining tip really helped my geometric design look clear.”
Bonus: How to Use Healed Mehndi for Stunning Photography
- Day 3: Use bright daylight and close-up macro shots.
- Day 5: Go for warm lights, golden hours, soft-focus photos.
- Day 7: Use vintage filters, black and white edits, or aesthetic mood lighting.
Always moisturize before a shoot—it enhances the glow.
Conclusion: Mehndi Is Not a Moment—It’s a Process
From day one to day seven, your mehndi design tells a story. Each phase—from bright orange to soft brown—is beautiful in its own way. If you understand how mehndi heals, you’ll not only plan your events better but also appreciate the journey more deeply.
Whether you’re prepping for your big day or simply adorning your hands for a festival, let the color evolve. Respect the process, care for your skin, and your mehndi will reward you with timeless beauty.
Because mehndi is not just an art—it’s an experience that unfolds over days, leaving behind memories etched in color.
Author: Aarzoo Kaur – Bridal Mehndi Artist & Cultural Beauty Writer
Aarzoo Kaur is a professional bridal mehndi artist, skin care advisor, and cultural content creator with over 8 years of hands-on experience in traditional Indian, Arabic, and fusion henna art. Based in Chandigarh, she has designed over 500+ mehndi styles for brides, fashion shoots, and festivals across India, the UK, and Canada. Her passion lies not just in creating stunning mehndi designs, but also in educating women on how to make their mehndi darker, long-lasting, and photograph-ready—no matter their skin tone or weather conditions.
What makes Aarzoo unique is her deep understanding of bridal emotions, seasonal skin prep, and post-application care routines that affect the final healed look of mehndi. Her tips and storytelling approach have helped countless readers and brides unlock the full beauty of their henna.
When she’s not drawing intricate motifs, she’s writing in-depth articles on mehndi care, skin rituals, and color-enhancement secrets rooted in both tradition and modern science. Aarzoo believes mehndi isn’t just a design—it’s a memory that should heal beautifully.
Follow her tips if you want mehndi that doesn’t just look good on Day 1—but stays stunning even on Day 7.